You’ve probably seen them – those amazing AI-generated portraits that transform you into a knight, an astronaut, or a fantasy hero. It’s a blast, right? These tools are incredible for reimagining your look. But sometimes, when you get the results back, there’s one small detail that just feels… off. The skin.
It can look too smooth, too plastic, or like it’s been airbrushed to an uncanny valley degree. It loses that natural texture, the subtle pores, the tiny imperfections that make skin real. If you’ve ever wondered why your AI self looks like a mannequin sometimes, or how to get that beautiful, authentic skin texture back, you’re in the right place.
We’re going to dive into practical, actionable steps you can take to make your AI portraits look much more lifelike. It’s not just about hitting a “generate” button; it’s about smart choices at every stage.
Structure Map
- Why AI Portraits Sometimes Miss the Mark on Skin
- Your Source Photos Are Gold: Feed the AI Well
- Smart Prompting: Guiding the AI to Realistic Skin
- Post-Processing Power: Refining Your AI Portrait
- Know Your Tools: Model Choice Matters
- The Art of Iteration: Practice Makes Perfect
- Frequently Asked Questions
Why AI Portraits Sometimes Miss the Mark on Skin
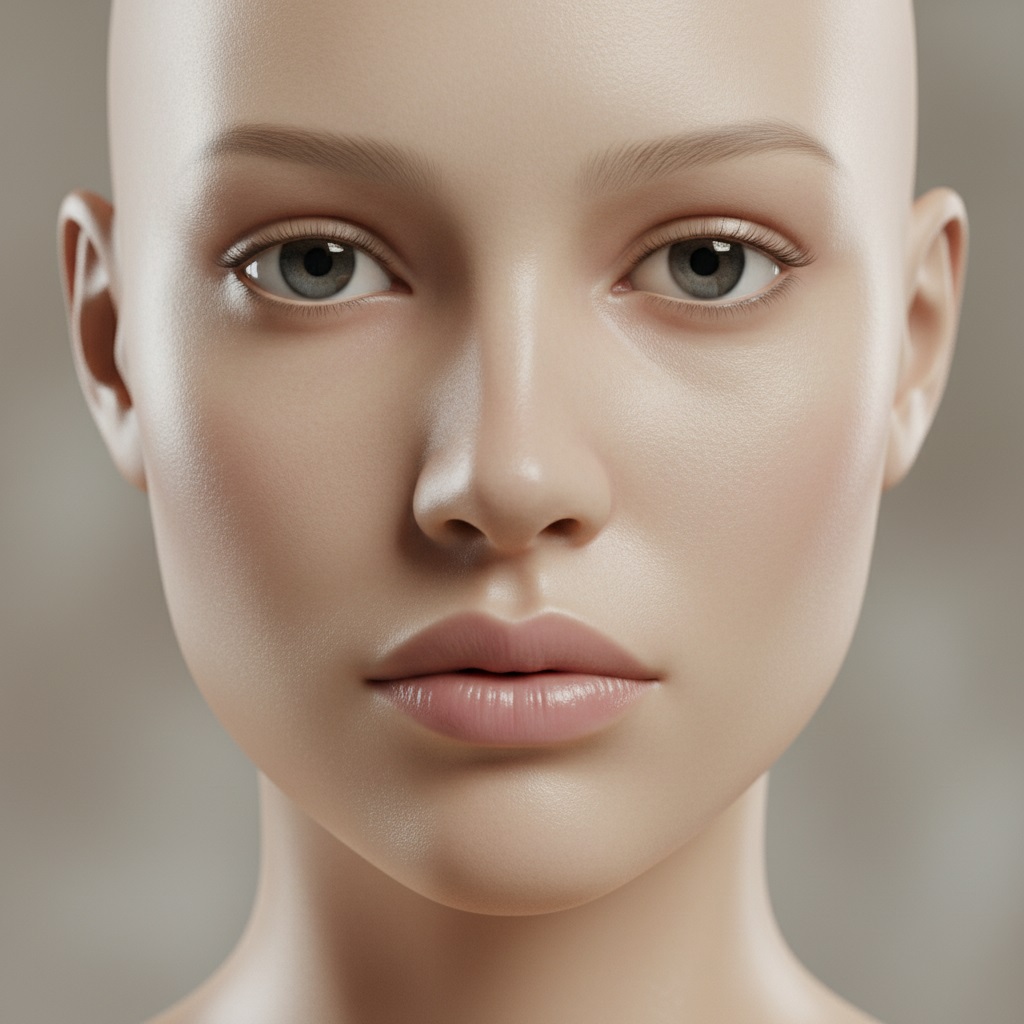
Before we fix it, let’s quickly understand why this happens. AI models learn from enormous datasets of images. While they’re fantastic at recognizing faces and styles, they often lean towards an idealized, “flawless” representation of skin. Think about highly retouched magazine covers.
This tendency means the AI might smooth over details it perceives as imperfections. It generalizes what “good skin” looks like, sometimes at the expense of natural texture. It also might not fully understand the subtle interplay of light and shadow that creates the illusion of depth and texture on real skin. The result? A perfectly smooth, but often lifeless, canvas.
Your Source Photos Are Gold: Feed the AI Well
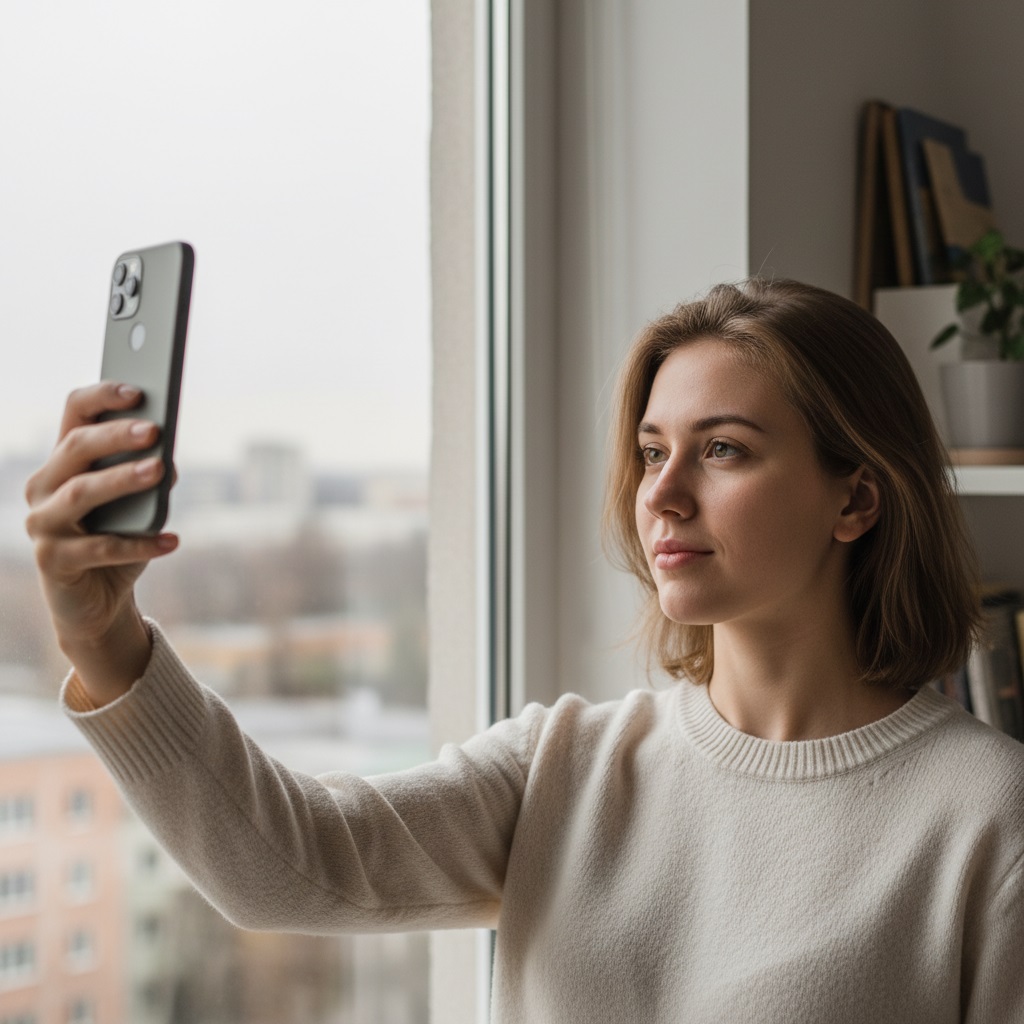
The quality of your AI portrait starts long before you type a single prompt. It begins with the photos you feed the AI. This is probably the most overlooked step, but it makes a huge difference. Garbage in, garbage out still applies, even with fancy AI.
Lighting is Everything
Think about how light interacts with your skin in real life. Direct, harsh light can flatten features, while soft, diffused light reveals subtle contours and textures.
- Use natural, soft light: Stand near a window, ideally on an overcast day, or use a softbox if you have one. This minimizes harsh shadows and highlights, letting the AI see your skin’s true texture.
- Avoid overexposure: Blown-out areas lose all detail. Make sure your skin tones are well-exposed without being too bright.
- Experiment with angles: Different light angles can emphasize or soften texture. Try taking photos with light coming from slightly to the side, not just head-on.
Variety in Your Selfies
Don’t just upload ten nearly identical photos taken at the same time. The AI needs to learn you from different perspectives and conditions.
- Different expressions: Smile, frown, look thoughtful. These change how skin stretches and folds.
- Varying distances: Include close-ups that show skin detail, as well as wider shots.
- Diverse settings and lighting: Photos taken outdoors, indoors, in different rooms. This helps the AI understand your features under various conditions, rather than just one specific look.
- No heavy makeup (initially): While you might want AI portraits with makeup, feed it some photos of your bare face first. This helps it learn your underlying skin texture without artificial layers obscuring it.
Check Your Resolution
High-resolution photos give the AI more data to work with. If your source images are tiny or pixelated, the AI has less information about your skin’s natural texture, making it more likely to smooth things over.
- Use your phone’s best camera setting: Most modern smartphones take excellent high-res photos.
- Crop smartly: If you need to crop, make sure the remaining portion is still high quality.
Smart Prompting: Guiding the AI to Realistic Skin

Once you’ve got great source photos, the next big step is how you talk to the AI. Your prompts are like instructions to an artist. Be clear, be specific, and don’t be afraid to experiment.
Specific Descriptors Beat Generic Ones
Instead of just saying “beautiful skin,” try to describe what kind of beautiful skin you want. The more detail you give, the better the AI can interpret your vision.
- Add texture keywords: Try “subtle skin texture,” “realistic pores,” “fine lines,” “natural skin imperfections,” “dewy skin,” “velvet skin,” “porcelain skin with slight texture,” “healthy skin texture.”
- Describe light interaction: “Soft light catching skin texture,” “skin with subtle highlights and shadows,” “natural skin sheen.”
- Avoid “perfect” or “flawless”: These words might trigger the AI’s smoothing tendency. Instead, focus on “healthy” or “radiant.”
- Example prompts:
- Good: “Close-up portrait of a woman, soft studio lighting, realistic pores, subtle skin texture, natural skin tone, healthy glow.”
- Better: “Detailed portrait of a person, natural skin texture with visible pores, slight sheen on the forehead, fine lines around the eyes, soft diffused light, photojournalism style.”
Negative Prompts Are Your Friends
Negative prompts tell the AI what not to include. This is incredibly powerful for counteracting unwanted smoothness.
- Common negative terms: “Smooth skin,” “plastic skin,” “airbrushed,” “blemish-free,” “flawless skin,” “unrealistic skin,” “doll skin,” “overly retouched.”
- Combine them: You can chain multiple negative prompts to be very precise.
- Example negative prompts:
(smooth skin:1.2), (plastic skin:1.1), airbrushed, blemish-free, unrealistic, doll-like(The numbers, like :1.2, are weights some AI models use to emphasize a negative instruction.)
Experiment with Styles and Artists
Different artistic styles naturally lend themselves to different levels of detail and realism.
- “Photo-realistic” or “cinematic” styles: These are often good starting points for natural texture.
- Artist names: If you know photographers or painters known for their realistic skin depictions, try adding their names to your prompt. For example, “in the style of [photographer known for natural portraits].”
- Avoid overly stylized terms (initially): Words like “hyper-realistic” can sometimes backfire and create an artificial, almost too-perfect look. Start with “realistic” and build from there.
Post-Processing Power: Refining Your AI Portrait
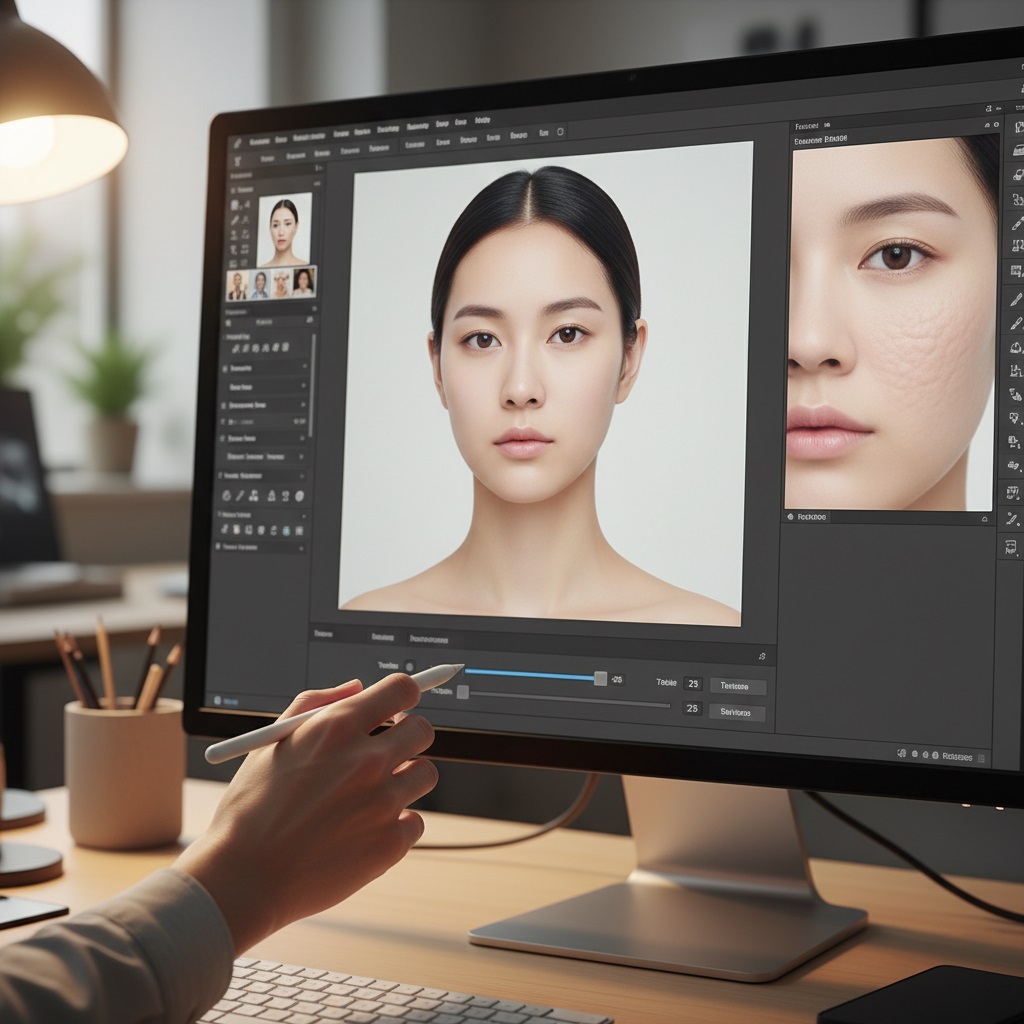
Sometimes, even with the best prompts and source photos, your AI portrait might need a little nudge in a photo editor. Think of it as the final polish. You don’t need to be a Photoshop wizard for these tips. Many free tools or even phone apps can do this.
Subtle Noise and Grain
Real photos have grain. It’s a natural part of photography and helps textures feel more authentic. Adding a tiny bit back can break up overly smooth areas.
- How to do it: Most photo editing apps have a “grain” or “noise” slider. Start with a very low amount (think 5-10% intensity) and zoom in to see the effect. You want it subtle, not gritty.
- Why it works: It mimics the natural imperfections of light capture and visually “roughens” unnaturally smooth surfaces, making them appear more textured.
Dodging and Burning for Dimension
This is an old photography trick that adds depth by selectively lightening (dodging) or darkening (burning) areas. It’s fantastic for enhancing the illusion of texture.
- Dodging: Lighten the natural high points of the skin (like the bridge of the nose, cheekbones, forehead) to make them pop.
- Burning: Darken the natural shadows (under the cheekbones, jawline) to create more contour.
- Be gentle: Use a very soft brush with low opacity (5-10%) and build up the effect slowly. The goal is subtle enhancement, not a drastic change. This technique helps define the form of the skin, which in turn suggests texture.
Using AI Upscalers and Remodelers (Carefully)
Some advanced AI tools can actually enhance resolution and add detail. Use these with caution.
- Upscalers: These can make a low-res image higher-res, sometimes inventing detail. Look for ones specifically designed for “photo realism” or “natural texture.”
- Remodelers/Detail Enhancers: Some AI tools offer features to “add detail” or “enhance realism.” Test these on a copy of your image. They can be great, but sometimes they overdo it, creating a “sharpened” look that’s still unnatural.
- Targeted application: If a tool allows, apply detail enhancement only to the skin areas, not hair or clothing.
Manual Texture Brushes
For those a bit more comfortable with photo editing software, you can find brushes that mimic skin pores.
- How to use: Apply these brushes on a new, transparent layer with a very low opacity (10-20%) over the smooth skin areas. Choose a color that matches the skin tone.
- Subtlety is key: You’re adding a hint of texture, not painting a new face. This is a more advanced technique but can be incredibly effective for localized areas.
Know Your Tools: Model Choice Matters
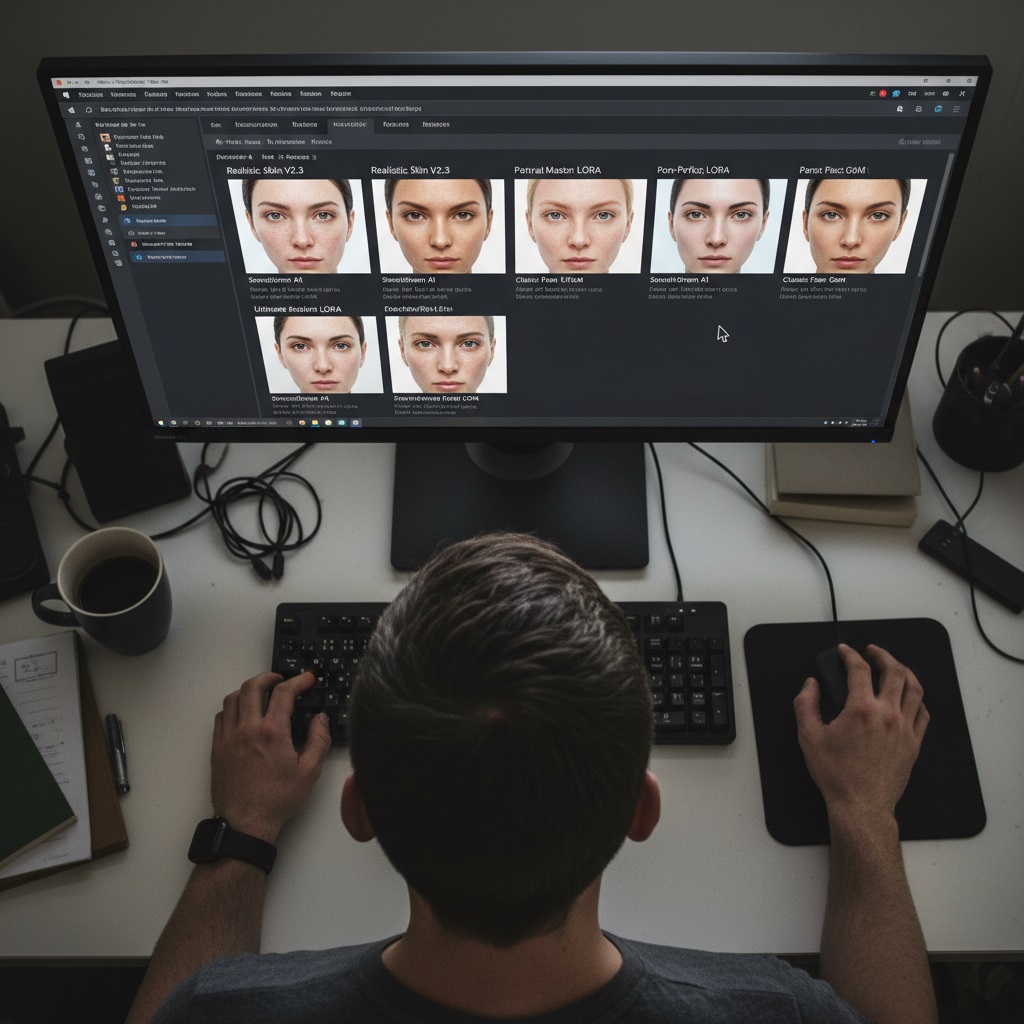
Just like different artists have different styles, different AI models and platforms have their own strengths and weaknesses. What works great on one might be less effective on another.
Research Model Strengths
Before you even start, do a little digging. Are you using a general-purpose AI image generator, or one specifically trained on portraits?
- Dedicated portrait models: Some AI tools or specific models (often available on platforms like Civitai for Stable Diffusion users) are fine-tuned for facial generation and realism. These are often better at understanding and rendering subtle skin textures.
- Check community examples: Look at what other users are creating with different models. If you see lots of plastic-looking skin, that model might not be the best for your goal.
Fine-Tuning and LORAs
If you’re using more advanced AI interfaces like Stable Diffusion, you might encounter terms like “fine-tuning” or “LORAs.”
- LORAs (Low-Rank Adaptation): These are small add-on models that modify the behavior of a larger AI model. You can find LORAs specifically designed to improve facial realism or skin texture.
- How to use: Download and integrate them with your chosen AI software (this can be a bit technical, but many tutorials exist). They act as a powerful modifier for your prompts, giving you much more control.
The Art of Iteration: Practice Makes Perfect
Getting truly realistic skin texture in AI portraits isn’t always a one-shot deal. It’s a process of trial and error.
- Generate multiple images: Don’t stop at the first result. Generate several variations using the same prompt to see what works best.
- Tweak your prompts: Change one or two words in your prompt and generate again. See how “subtle skin texture” differs from “detailed skin pores.”
- Learn from every attempt: If a portrait looks too smooth, analyze your prompt. Did you use any words that might have encouraged smoothing? If it looks too rough, maybe your negative prompts were too strong, or you added too much grain in post-processing.
- Keep a log: Note down which prompts, negative prompts, and settings gave you the best results. This saves you time later.
Think of yourself as a director guiding an artist. You give instructions, see the output, and refine your guidance until you get exactly what you’re looking for. It takes a little patience, but the results are worth it. You’ll create AI portraits that truly capture your essence, with all the beautiful, natural texture that makes you, you.
Frequently Asked Questions
Why do my AI portraits always look like they have plastic skin, even with good prompts?
Even with good prompts, the underlying AI model might be biased towards smoothing. Many models are trained on datasets that include heavily retouched images, leading them to prioritize “flawless” over “realistic.” Make sure your source photos are high quality and varied. Also, consistently use strong negative prompts like “plastic skin,” “airbrushed,” and “smooth skin.” Sometimes, it also means trying a different AI model or a specific LORA designed for realism.
Can I fix plastic-looking skin in an AI portrait if I don’t have advanced photo editing software?
Yes, you can! Many free mobile apps like Snapseed, Lightroom Mobile, or even your phone’s built-in photo editor offer tools to add subtle grain, sharpen details, or adjust clarity. Look for features like “Grain,” “Noise,” “Texture,” or “Clarity.” You can also make minor adjustments to highlights and shadows to enhance implied texture. The key is to use these tools very sparingly and subtly.
What’s the most important factor for getting natural skin texture in AI portraits?
While all the steps help, the most important factor is a combination of high-quality, diverse source photos and specific, well-crafted prompts (including negative prompts). If the AI doesn’t have good data to learn from initially, or if your prompts aren’t guiding it clearly, you’ll struggle regardless of other techniques. The input data and initial instructions lay the foundation for everything else.